When I first started knitting and crocheting, all I made were scarves. Chunky scarves, ribbed scarves, stiff and unwearable scarves.
A scarf is the perfect pandemic project for those who want to learn a new stitch pattern without committing to something you’ll never finish. (Ahem, abandoned blanket #3, incomplete sweater #5, back panel of a cardigan.)
This holiday season, my gift to you is the Eastside Scarf crochet pattern — the least successful pattern design in my online shop — for free! (Or you can purchase the printer-friendly version to support a small business. It will be yours to keep forever and ever!)
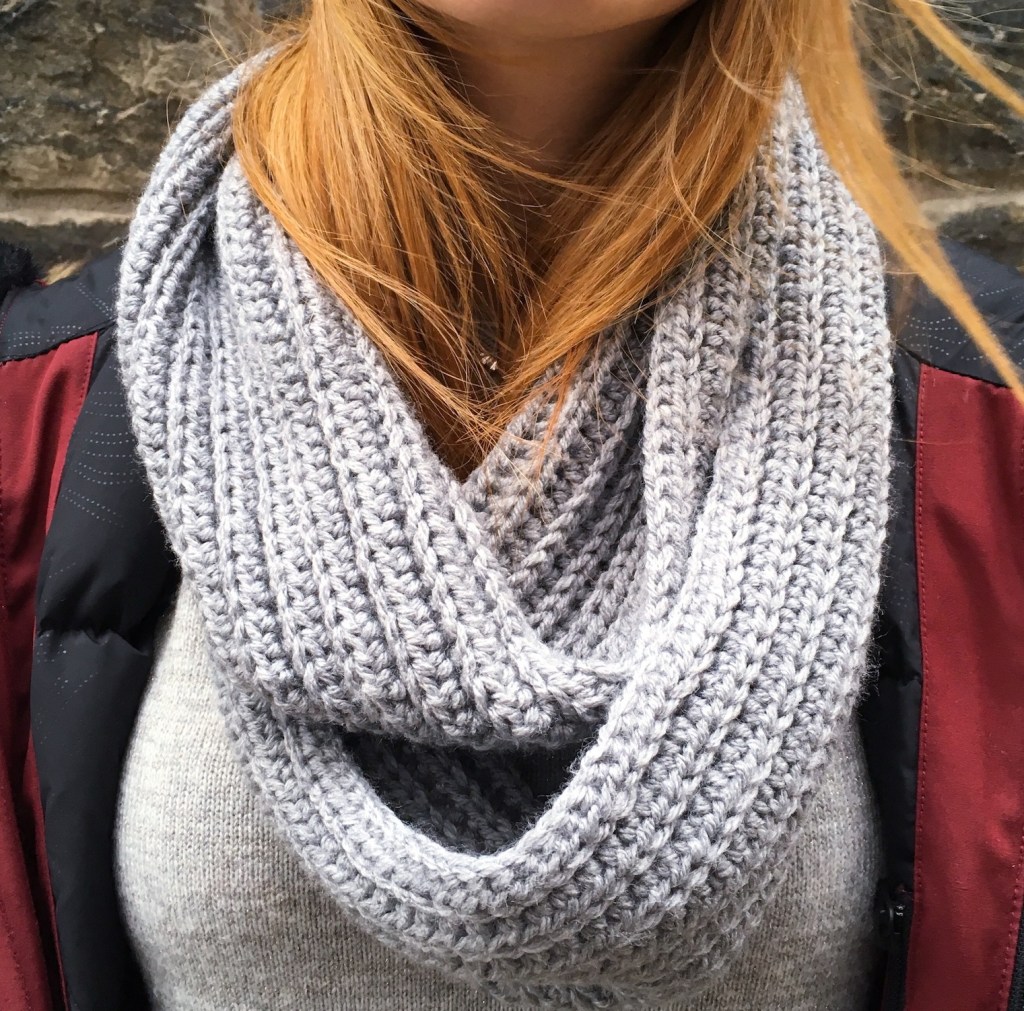
This crochet project was intentionally designed to look like a knitted ribbed scarf. It is worked flat and joined together at the ends to create a beautiful ribbed infinity scarf. Any medium weight yarn can be used.
As with any patterns, please don’t copy and resell the instructions. Feel free to post photos of the #eastsidescarf, sell your finished creations and tag me @nextstitch.
Materials
- Medium Weight Yarn (~300 yd/ 275m) such as a ball of Red Heart Soft, Caron Simply Soft or Bernat Premium
- 6mm Crochet Hook
- Tapestry Needle
- Measuring Tape
- Scissors
Measurements
About 7“ (18 cm) wide and 28” (72 cm) long
Gauge
17 sts – 10 rows = 4” (10 cm) in ribbed stitch
Terms
CH = Chain
YO = Yarn over
HDC = Half double crochet
FHDC = Foundation half double crochet
HDC BLO = Half double crochet back loop only
HDC BLO SLST = Half double crochet back loop only slip stitch
Foundation Row
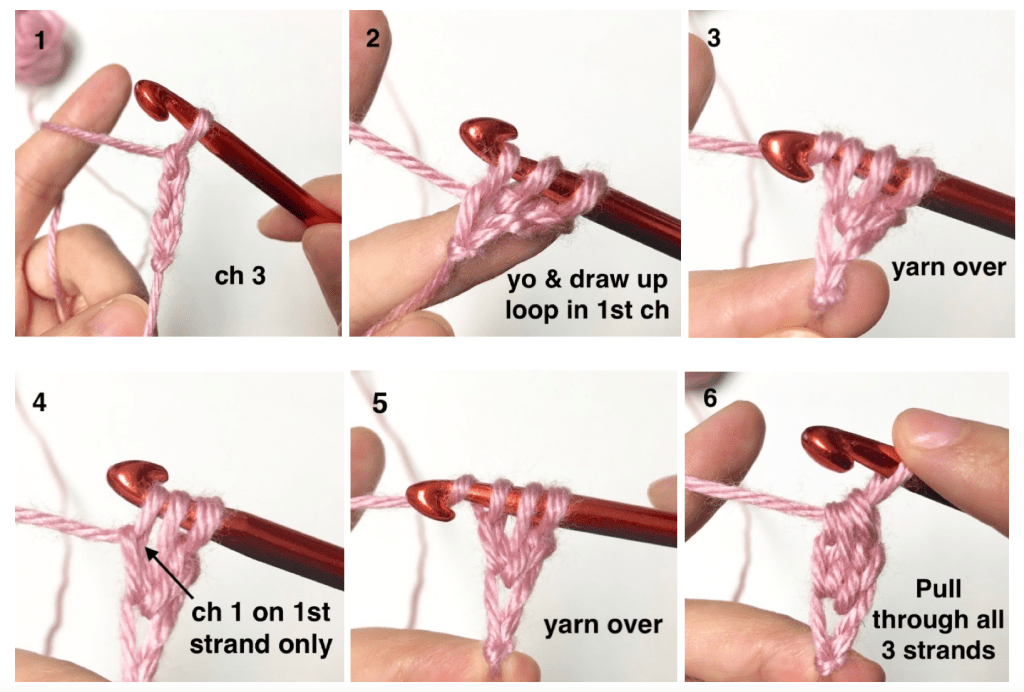
Row 1: Ch 3 to start the first foundation half double crochet stitch (FHDC). Yarn over and insert the hook into the very first chain. Draw up a loop. Ch 1 only on the loop that you drew up. Yarn over and pull through all 3 strands on the hook (Figures 1-6).
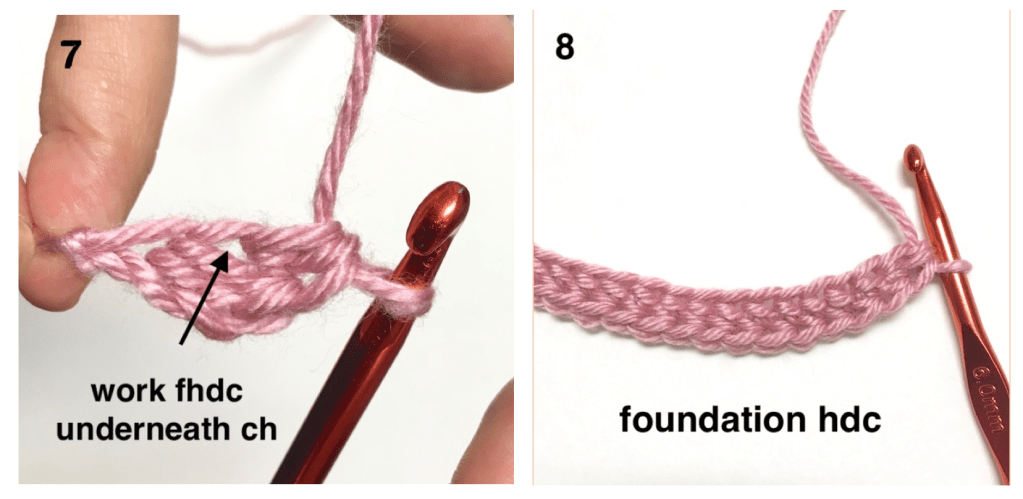
Begin the next FHDC stitch by yarning over and inserting the hook underneath the 2nd stitch from the hook (Figure 7). Make sure to work under both strands of the stitch (looks like a V when viewed from the top). Draw up a loop. Ch 1 on the loop you drew, yarn over and pull through all 3 strands.
Continue doing FHDCs until the row is about 58-61 inches (148-155 cm) long (approx. 190-196 chains). Finish by chaining 1 and turning your work. Don’t worry if the foundation row seems long. The length of the finished scarf will be shorter than the length of the foundation row.
Pattern
Row 2 (HDC BLO SLST): Every row from this point forward will be worked in the back loop only. The ch 1 does not count as a stitch, so work into the very first stitch. You will be doing half double crochet back loop only slip stitches (HDC BLO SLST) across the row.
To start, yarn over once. Insert the hook into the back loop of the first stitch and pull up a strand. Pull this strand all the way through the 2 remaining loops on the hook (Figures 9-12).
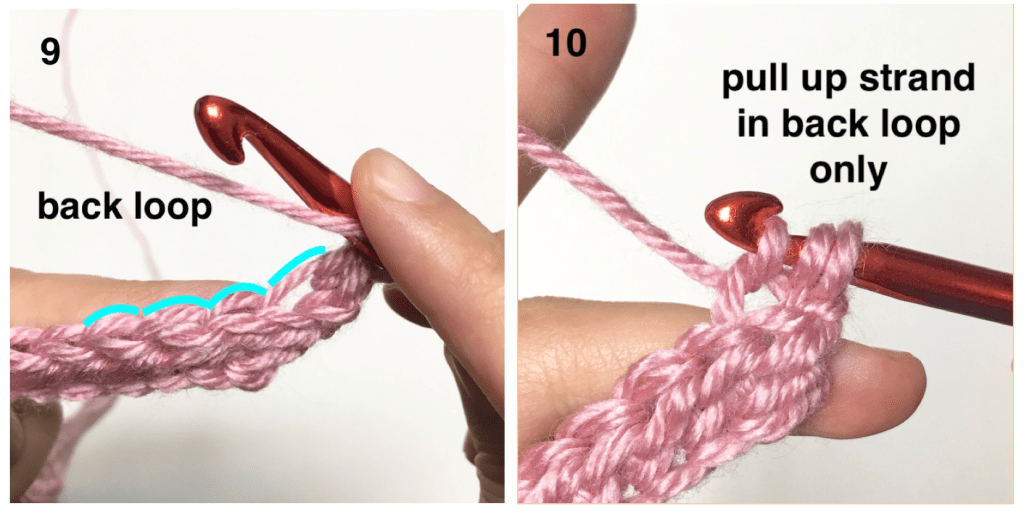
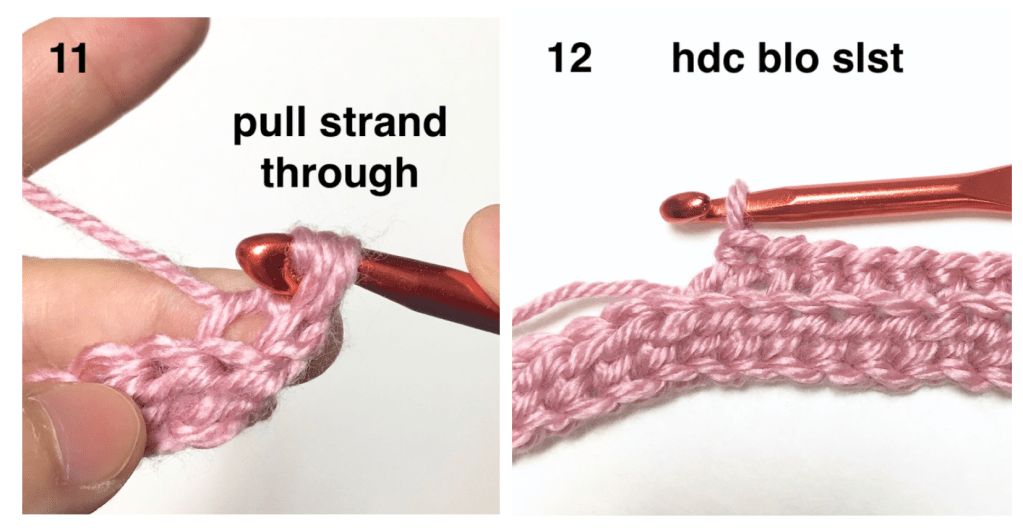
It helps to use your opposite hand to hold the stitches steady as you pull the strand. Repeat the HDC BLO SLST in each stitch across. After completing the last stitch of the row, ch 2 and turn.
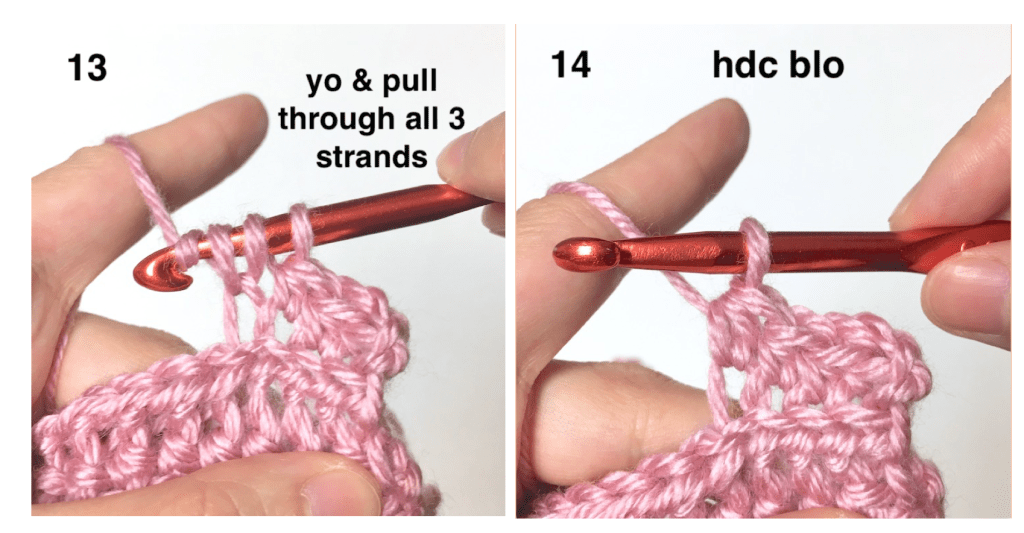
Row 3 (HDC BLO): Yarn over, insert the hook into the back loop of the first stitch and pull up a strand. Yarn over again and pull the yarn through all 3 strands (Figures 13-14). Continue doing the HDC BLO across the entire row. Ch 1 and turn.
Row 4 – onwards: Repeat row 2 and 3, alternating between the HDC BLO SLST row and HDC BLO row, until the scarf reaches about 7 inches (18 cm) in width. End with a HDC BLO row. Depending on the yarn, this could come out to 19-23 rows.
For this pattern, every HDC BLO row starts with a ch 2 and every HDC BLO SLST row starts with a ch 1. Make sure to work into the first stitch of each row. When you’ve reached your desired width, fasten off and cut a yarn tail about 20 inches (50 cm) long.
Joining Ends
To join the two ends of the scarf, use the mattress stitch to weave the yarn tail from the back of the scarf to the front. As you connect the ends together, pull the yarn tail to close up any gaps. When you arrive at the bottom, create a knot and weave the remaining yarn into the scarf. And you’re done!
